


Avandrive has released Pixlr, a free professional photo editing program built into Avandrive Web Portal. The software is available to all Avandrive customers and can be accessed by logging into your web portal.
Many of you upload photos to your accounts, but some of you may not be great image editors. To help you improve your skills we have created an intermediate guide to editing photos on Pixlr.
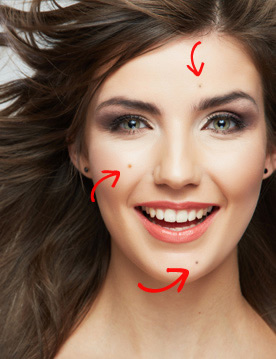
1. Removing Imperfections
Real life isn’t perfect. Sometimes an image can be ruined by a small mark on the camera lens or some form or imperfection in the object or landscape you are a taking a picture of. Using the spot heal option on Pixlr you can remove unwanted marks or imperfections from your image. The Pixlr system works by replacing the marks, with the colours of the pixels next to it.
Example:
I do not want the black dots on the face in this picture to be shown on my image. I can remove them simply by selecting the “spot heal tool” which has the symbol “![]() ” and then left click on the area with the imperfection.
” and then left click on the area with the imperfection.
| Before | After |
 |
 |
This same technique can be used to remove any imperfections in any landscape image or even to remove spots from a person’s face.
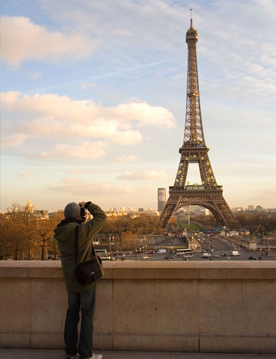
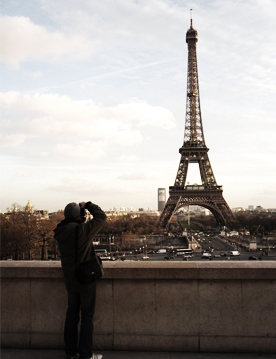
2. Changing Hue, Saturation and Lightness
Pixlr also gives you the option to edit the hue, saturation and contrast of your image. This is an amazing feature for making washed out images brighter or dark images lighter.
Example:
Let’s say you want to add a gloomy atmosphere to your image. Click on “Adjustment” tab on the top menu and then choose “Hue and Saturation”. You can then move the saturation bar to the left and the lightness bar to the left. Once you have found a good level click OK. The image now looks like a set from a Sci-fi movie.
| Before | After |
 |
 |
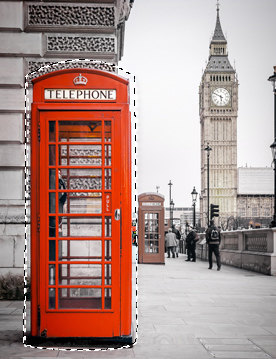
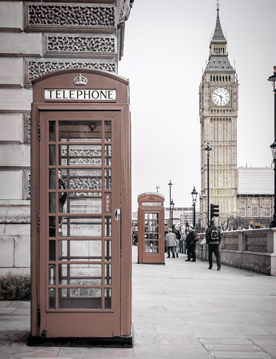
3. Removing Bright Colours from an Image
Images that have bright colour which you would like to make duller or remove completely, can be edited by using the selection toll and the Saturation function. This will enable you to remove colour from one section of an image.
Example: My image looks gloomy however at the moment it has a red telephone box which isn’t the effect I want.
In order to remove the red colour, click on the “Lasso tool” “”, hold the left mouse button and draw around the line. Once you have drawn around the whole of the telephone box let go of the mouse button and you will see a flashing line surrounding the red box section. You then simply click on the “Adjustment” tab on the top menu and select “Hue and Saturation”. You can then drag the saturation bar fully to the left and adjust the colour of the box. The image now no longer has a noticeable bright red colour section.
| Before | After |
 |
 |
Please note: If the original image is too bright or too dark due to the fact that the camera may not have captured all of the information it needs in the brightest or darkest areas, this will result in an image being overexposed or having crushed blacks. Editing programs are not able to fully rectify this problem.
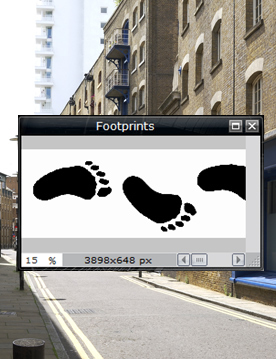
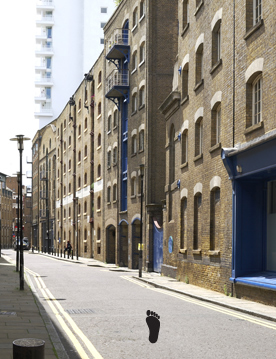
4. Combining Images
Pixlr layers your images – this means that you can add an image on top of another and they remain as two separate layers, without becoming one flat image. This gives you the advantage of being able to move an object once you have clicked off of it.
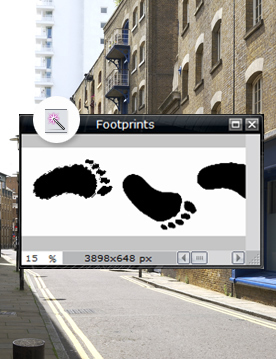
Example: Let us say that we want to add this image of a foot step to our image. First we have to click “File” on the top menu and select open. Then look for the image of the foot on my computer or in my Storage by clicking on the Avandrive disc. The image of footprints will now open in a second window. Simply click on the image and then click on the “wand tool” which looks like this “” on the left hand menu.
When you click on the footprint you will see a flashing line appearing around it. By holding shift will allow you to select the toe sections of the foot print as well.
| Image | Selected image |
 |
 |
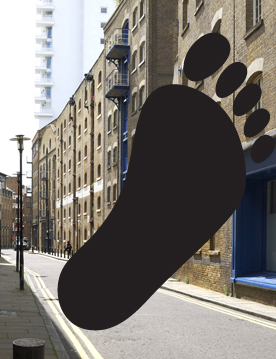
Next you click on “edit” and “copy” and then select the tube landscape image and select “edit” and “paste”. The footprint is now in your first image however it is too big. Selecting “Edit” and then “Free transform” will allow you to easily resize the image, change its rotation, and change its position.
| Before | After |
 |
 |
5. Distorting Images
Pixlr also allows you to distort images making people look like they are in the hall of mirrors or make a landscape look like a spiral.
Example: Finally, to improve my image I need to make the foot print appear as if it is actually on the floor. To do this I must use the distort function. Simple click “Edit”, “Free distort” and then move the sides of the image until the pictures looks right.
| Before | After |
|
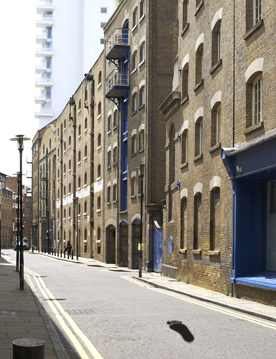 |
You can use all these tips in different ways to drastically change other images. You could make an image of an overcast day look sunny or add a person to an image of a landscape background.
If you wish to use Pixlr simply login to Avandrive Web Portal, open your image and click on the “edit in pixlr” button.


